This article is updated for Moments Designer v1.03 - later versions might differ slightly.
Starting with version 1.03, Moments Designer introduces spread templates as another fast and easy way of arranging your photos. This is apparent when looking at page preview screen, the top bar has some additional buttons/functions:

Those buttons are highlighted in the image above: Select Layout, Random Layout, Save As Template and Auto Design.
Select Layout button opens the template manager window. From here, you can select the template to be used for the current spread. The page must have some photos added already because, when selecting a certain template, the page photos will be arranged in a new layout, as in the template used.
Template window is shown below:

Templates are organized according to the number of photos/images it contains. Browse, using the tabs on the left. Click on a template to apply the design.
Random Layout button rearranges images inside the current page by selecting a random template and applying it's design. The template selected will have the same number of images as the page meaning that if the page contains four photos already added, the random template used will also have four photos in its structure.
Save As Template. When you have a nice layout already designed and want to save it and use it in other projects, use this button to save a copy as a template.
Auto Design is a button switch. When green, it's active and as a result, when dropping an image from the library, it will be added to the page and the page will be arranged according to a random template layout that has the same number of photos in structure. When it's active, when dragging an image from library, the page will darken slightly to signal that it's ready to receive another image.
Designing a page using the template system can be done in two ways:
Method 1.
a) Creating a new album spread from a template. On album preview screen, a new page can be added as an empty spread or as a template spread, you have two distinct buttons to do this:
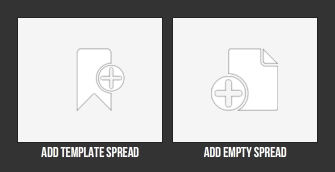
Clicking on "Add Template Spread" button will open the template window for you to select a template. Once selected, a new template page is created with all the structure, but with no images. Click on the page to open it in the page editor.
b) Make sure the "Auto Design" button is not active, it's gray. Toggle its state by clicking on it.
c) Drag images from library to fill the empty spots represented as an uniform color.
d) The page is finished or you can go further and change the layout by pressing "Random Layout" or "Select layout" to pick a new design from template.
Method 2.
a) Create a new album spread as an empty page
b) Make sure the "Auto Design" button is active, it's green. Toggle its state by clicking on it.
c) Drag images from library onto the page. The elements will be auto arranged. Drag as many images as you need, Ideally, less than ten or the page will seem crowded.
d) The page is finished or you can go further and change the layout by pressing "Random Layout" or "Select layout" to pick a new design from template, just like in previous method.
Use either methods to complete the album design. Should not take more than minutes.